
상단 탭 하단 탭 만들기
상단 탭 만들기
activity_main.xml
1
2
3
4
5
6
7
8
9
10
11
12
13
14
15
16
17
18
19
20
21
22
23
24
25
26
27
28
29
30
31
32
33
34
35
36
37
38
39
40
41
42
43
44
45
46
47
48
49
50
51
52
53
54
55
<?xml version="1.0" encoding="utf-8"?>
<RelativeLayout xmlns:android="http://schemas.android.com/apk/res/android"
    xmlns:app="http://schemas.android.com/apk/res-auto"
    android:layout_width="match_parent"
    android:layout_height="match_parent">

    <androidx.coordinatorlayout.widget.CoordinatorLayout
        android:layout_width="match_parent"
        android:layout_height="match_parent">

        <com.google.android.material.appbar.AppBarLayout
            android:layout_width="match_parent"
            android:layout_height="wrap_content"
            android:theme="@style/ThemeOverlay.AppCompat.Dark.ActionBar">

            <androidx.appcompat.widget.Toolbar
                android:id="@+id/toolbar"
                android:layout_width="match_parent"
                android:layout_height="wrap_content"
                android:background="?colorPrimaryDark"
                android:elevation="1dp"
                android:theme="@style/ThemeOverlay.AppCompat.Dark">

                <TextView
                    android:id="@+id/titleText"
                    android:layout_width="wrap_content"
                    android:layout_height="wrap_content"
                    android:text="타이틀"
                    android:textAppearance="@style/Base.TextAppearance.Widget.AppCompat.Toolbar.Title" />

            </androidx.appcompat.widget.Toolbar>

            <com.google.android.material.tabs.TabLayout
                android:id="@+id/tabs"
                android:layout_width="match_parent"
                android:layout_height="wrap_content"
                android:background="@android:color/background_light"
                android:elevation="1dp"
                app:tabGravity="fill"
                app:tabMode="fixed"
                app:tabSelectedTextColor="?colorAccent"
                app:tabTextColor="?colorPrimary" />
        </com.google.android.material.appbar.AppBarLayout>

        <FrameLayout
            android:id="@+id/container"
            android:layout_width="match_parent"
            android:layout_height="match_parent"
            app:layout_behavior="@string/appbar_scrolling_view_behavior">

        </FrameLayout>

    </androidx.coordinatorlayout.widget.CoordinatorLayout>

</RelativeLayout>
위의 XML 구조를 정리하면 다음과 같다.
1
2
3
4
5
6
7
8
9
10
<CoordinatorLayout>
 <AppBarLayout>
   <Toolbar>
   </Toolbar>
   <TabLayout>
   </TabLayout>
   </AppBarLayout>
   <FrameLayout>
   </FrameLayout>
   </CoordinatorLayout>
CoordinatorLayout은 액션 바 영역을 포함한 전체 화면의 위치를 잡아주는 역할을 한다.
CoordinatorLayout 안에 AppBarLayout과 함께 다른 레이아웃을 넣으면 그 둘 간의 간격이나
위치가 자동으로 결정된다.
AppBarLayout은 액션바를 가르킨다.
인제 res/layout 폴더 안에 fragment 파일들을 추가하자.
Fragmnet1.java와 fragment1.xml 파일을 인플레이션 해주자.
Fragment1.java
1
2
3
4
5
6
7
public class Fragment1 extends Fragment {

    @Override
    public View onCreateView(LayoutInflater inflater, ViewGroup container, Bundle savedInstanceState){
        return inflater.inflate(R.layout.fragment1,container,false);
    }
}
Fragment1.xml
1
2
3
4
5
6
7
8
9
10
11
12
13
<?xml version="1.0" encoding="utf-8"?>
<LinearLayout xmlns:android="http://schemas.android.com/apk/res/android"
  android:layout_width="match_parent"
  android:layout_height="match_parent"
  android:background="#00BCD4">

 <Button
  android:id="@+id/button"
  android:layout_width="wrap_content"
  android:layout_height="wrap_content"
  android:layout_weight="1"
  android:text="첫 번째" />
</LinearLayout>
위와 같이 Fragment2,3 파일도 만들어주자.
그리고 MainActivity.java 파일을 아래와 같이 수정
1
2
3
4
5
6
7
8
9
10
11
12
13
14
15
16
17
18
19
20
21
22
23
24
25
26
public class MainActivity extends AppCompatActivity {

    Toolbar toolbar;

    Fragment1 fragment1;
    Fragment2 fragment2;
    Fragment3 fragment3;

    @Override
    protected void onCreate(Bundle savedInstanceState) {
        super.onCreate(savedInstanceState);
        setContentView(R.layout.activity_main);

        toolbar = findViewById(R.id.toolbar);
        setSupportActionBar(toolbar);

        ActionBar actionBar = getSupportActionBar();
        actionBar.setDisplayShowTitleEnabled(false);

        fragment1 = new Fragment1();
        fragment2 = new Fragment2();
        fragment3 = new Fragment3();

        getSupportFragmentManager().beginTransaction().replace(R.id.container,fragment1).commit();
    }
}
위의 자바 파일에서 setSupportActionBar 메서드는 액티비티에 디폴트로 만들어진 액션바가 없을
경우에만 동작한다.
우리가 테마를 액션바가 들어있는 테마로 설정 했기 때문에
프로젝트가 만들어질 때 메인 액티비티에서 자동으로 액션바가 만들어진다 .
액티비티에 설정된 테마를 변경하기 위해 /app/res/values 폴더 안에 있는 themes.xml 파일을 연다.
그리고 아래와 같이 수정한다.
1
2
   <style name="Theme.SampleTab" parent="Theme.MaterialComponents.DayNight.NoActionBar">
이렇게 하면 이 스타일을 적용한 액티비티에는 액션바가 만들어지지 않는다.
액션바를 따로 만들고 싶으면 직접 setSupportActionBar 메서드를 호출하여야 한다.
하단 탭 만들기
하단 탭은 BottomNavigationView 위젯으로 만들 수 있다.
/app/res 폴더에 menu 폴더를 만든 후 menu_bottom.xml 파일을 만든다.
activity_main.xml
1
2
3
4
5
6
7
8
9
10
11
12
13
14
15
16
17
18
19
20
21
22
23
24
25
26
27
<?xml version="1.0" encoding="utf-8"?>
<androidx.constraintlayout.widget.ConstraintLayout xmlns:android="http://schemas.android.com/apk/res/android"
    xmlns:app="http://schemas.android.com/apk/res-auto"
    android:layout_width="match_parent"
    android:layout_height="match_parent">

    <FrameLayout
        android:id="@+id/container"
        android:layout_width="match_parent"
        android:layout_height="match_parent"
        app:layout_behavior="@string/appbar_scrolling_view_behavior" />

    <com.google.android.material.bottomnavigation.BottomNavigationView
        android:id="@+id/bottom_navigation"
        android:layout_width="match_parent"
        android:layout_height="wrap_content"
        android:layout_marginEnd="0dp"
        android:layout_marginStart="0dp"
        app:layout_constraintBottom_toBottomOf="parent"
        app:layout_constraintLeft_toLeftOf="parent"
        app:layout_constraintRight_toRightOf="parent"
        app:itemBackground="?colorPrimary"
        app:itemIconTint="@drawable/item_color"
        app:itemTextColor="@drawable/item_color"
        app:menu="@menu/menu_bottom" />

</androidx.constraintlayout.widget.ConstraintLayout>
Activity_main.java
1
2
3
4
5
6
7
8
9
10
11
12
13
14
15
16
17
18
19
20
21
22
23
24
25
26
27
28
29
30
31
32
33
34
35
36
37
38
39
40
41
42
43
44
45
46
47
public class MainActivity extends AppCompatActivity {

    Fragment1 fragment1;
    Fragment2 fragment2;
    Fragment3 fragment3;

    @Override
    protected void onCreate(Bundle savedInstanceState) {
        super.onCreate(savedInstanceState);
        setContentView(R.layout.activity_main);

        fragment1 = new Fragment1();
        fragment2 = new Fragment2();
        fragment3 = new Fragment3();

        getSupportFragmentManager().beginTransaction().replace(R.id.container, fragment1).commit();

        BottomNavigationView bottomNavigation = findViewById(R.id.bottom_navigation);
        bottomNavigation.setOnNavigationItemSelectedListener(new BottomNavigationView.OnNavigationItemSelectedListener() {
            @Override
            public boolean onNavigationItemSelected(@NonNull MenuItem item) {
                switch (item.getItemId()) {
                    case R.id.tab1:
                        Toast.makeText(getApplicationContext(), "첫 번째 탭 선택됨", Toast.LENGTH_LONG).show();
                        getSupportFragmentManager().beginTransaction()
                                .replace(R.id.container, fragment1).commit();

                        return true;
                    case R.id.tab2:
                        Toast.makeText(getApplicationContext(), "두 번째 탭 선택됨", Toast.LENGTH_LONG).show();
                        getSupportFragmentManager().beginTransaction()
                                .replace(R.id.container, fragment2).commit();

                        return true;
                    case R.id.tab3:
                        Toast.makeText(getApplicationContext(), "세 번째 탭 선택됨", Toast.LENGTH_LONG).show();
                        getSupportFragmentManager().beginTransaction()
                                .replace(R.id.container, fragment3).commit();

                        return true;
                }

                return false;
            }
        });
    }
}
menu_bottom.xml
1
2
3
4
5
6
7
8
9
10
11
12
13
14
15
16
17
18
19
20
21
22
23
24
25
<?xml version="1.0" encoding="utf-8"?>
<menu xmlns:android="http://schemas.android.com/apk/res/android"
    xmlns:app="http://schemas.android.com/apk/res-auto" >

    <item
        android:id = "@+id/tab1"
        app:showAsAction="ifRoom"
        android:enabled="true"
        android:icon="@android:drawable/ic_dialog_email"
        android:title="이메일"/>

    <item
        android:id="@+id/tab2"
        app:showAsAction="ifRoom"
        android:icon="@android:drawable/ic_dialog_info"
        android:title="정보"/>

    <item
        android:id="@+id/tab3"
        app:showAsAction="ifRoom"
        android:enabled="true"
        android:icon="@android:drawable/ic_dialog_map"
        android:title="위치"/>

</menu>
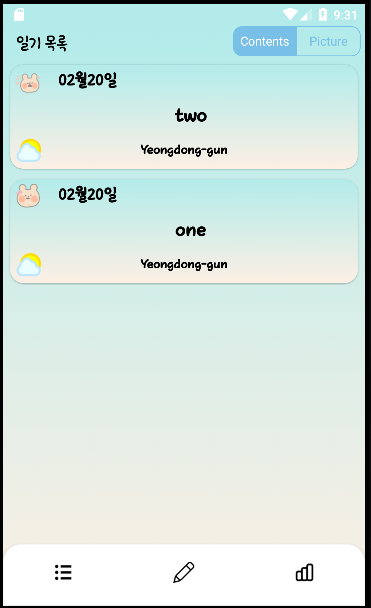
결과
하단 탭 커스텀
res/drawable/custom_buttom.xml
1
2
3
4
5
6
7
8
9
10
11
12
<?xml version="1.0" encoding="utf-8"?>
<shape xmlns:android="http://schemas.android.com/apk/res/android"
    android:shape="rectangle">
    <solid
        android:color="@color/white"/>
    <corners
        android:topRightRadius="20dp"
        android:topLeftRadius="20dp"/>
    <stroke
        android:color="#F5F5F5"
        android:width="1dp"/>
</shape>
activity.xml
1
2
3
4
5
6
7
8
9
10
11
12
13
14
15
16
17
18
19
20
21
22
23
24
25
26
27
28
29
30
31
<?xml version="1.0" encoding="utf-8"?>
<androidx.constraintlayout.widget.ConstraintLayout xmlns:android="http://schemas.android.com/apk/res/android"
    xmlns:app="http://schemas.android.com/apk/res-auto"
    android:id="@+id/parent"
    android:layout_width="match_parent"
    android:layout_height="match_parent"
    android:background="@drawable/base_bg">

    <FrameLayout
        android:id="@+id/container"
        android:layout_width="match_parent"
        android:layout_height="match_parent"
        app:layout_behavior="@string/appbar_scrolling_view_behavior"/>

    <com.google.android.material.bottomnavigation.BottomNavigationView
        android:id="@+id/bottom_navigation"
        android:layout_width="match_parent"
        android:layout_height="70dp"
        android:layout_gravity="bottom"
        android:background="@drawable/bottom"
        app:itemIconTint="@color/black"
        app:itemPaddingTop="20dp"
        app:itemTextColor="@drawable/item_color"
        app:layout_constraintBottom_toBottomOf="parent"
        app:layout_constraintLeft_toLeftOf="parent"
        app:layout_constraintRight_toRightOf="parent"
        app:menu="@menu/menu_bottom" />


</androidx.constraintlayout.widget.ConstraintLayout>
참고 : href=” https://stackoverflow.com/questions/64234753/is-there-a-way-to-add-rounded-corners-to-an-android-material-view-bottom-navigat
https://onlyfor-me-blog.tistory.com/425