프레임 레이아웃
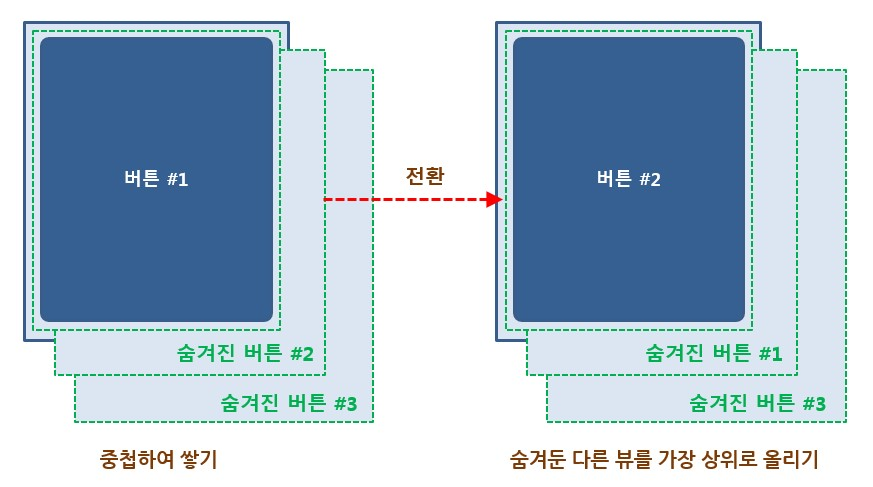
프레임 레이아웃(FrameLayout)은 가장 위에 있는 하나의 뷰만 화면에 보여준다.
만약 그 안에 여러개의 뷰나 뷰 그룹을 추가했다면 나머지는 그 아래에 중첩되어 쌓인다.
자주 사용될거 같지 않지만, 생각보다 상당히 많이 사용된다고 한다.
그 이유는 한번에 하나의 뷰만 보여주면서 나머지는 보이지 않게 그 아래에 중첩 시켜 놨다가 그 중에 특정 뷰를 보이거나 보이지 않도록 하면 손 쉽게 뷰를 바꾸면서 보여줄 수 있기 때문이다.
프레임 레이아웃 안에서 새 개의 버튼을 추가한다면,
가장 상위에 있는 버튼만 보이게 된다. (버튼의 크기는 화면 전체를 차지하도록 만들어야 한다.)
만약 가장 상위에 있는 버튼이 화면 전체를 차지하지 않으면
그 아래에 있는 뷰의 일부분이 보일 수 있다.
가시성 속성
프레임 레이아웃에서 가장 위에 있는 뷰를 보이지 않게 하면 그 다음 뷰가 보이는데,
이렇게 보이거나 보이지 않게 하는 속성이 가시성(Visibility) 속성이다.
가시성 속성을 사용하여 특정 뷰를 보이거나 보이지 않게 하면 화면에 보이는 뷰가
전환되는 효과도 만들 수 있다. 속성의 이름은 visibility로 되어 있다.
자바 코드에서 설정하고 싶으면 setVisibility 메서드를 사용하면 된다.
프레임 레이아웃 사용하기
drawable 폴더에 사진을 넣고 아래 이미지 같이 세팅 해줍니다.
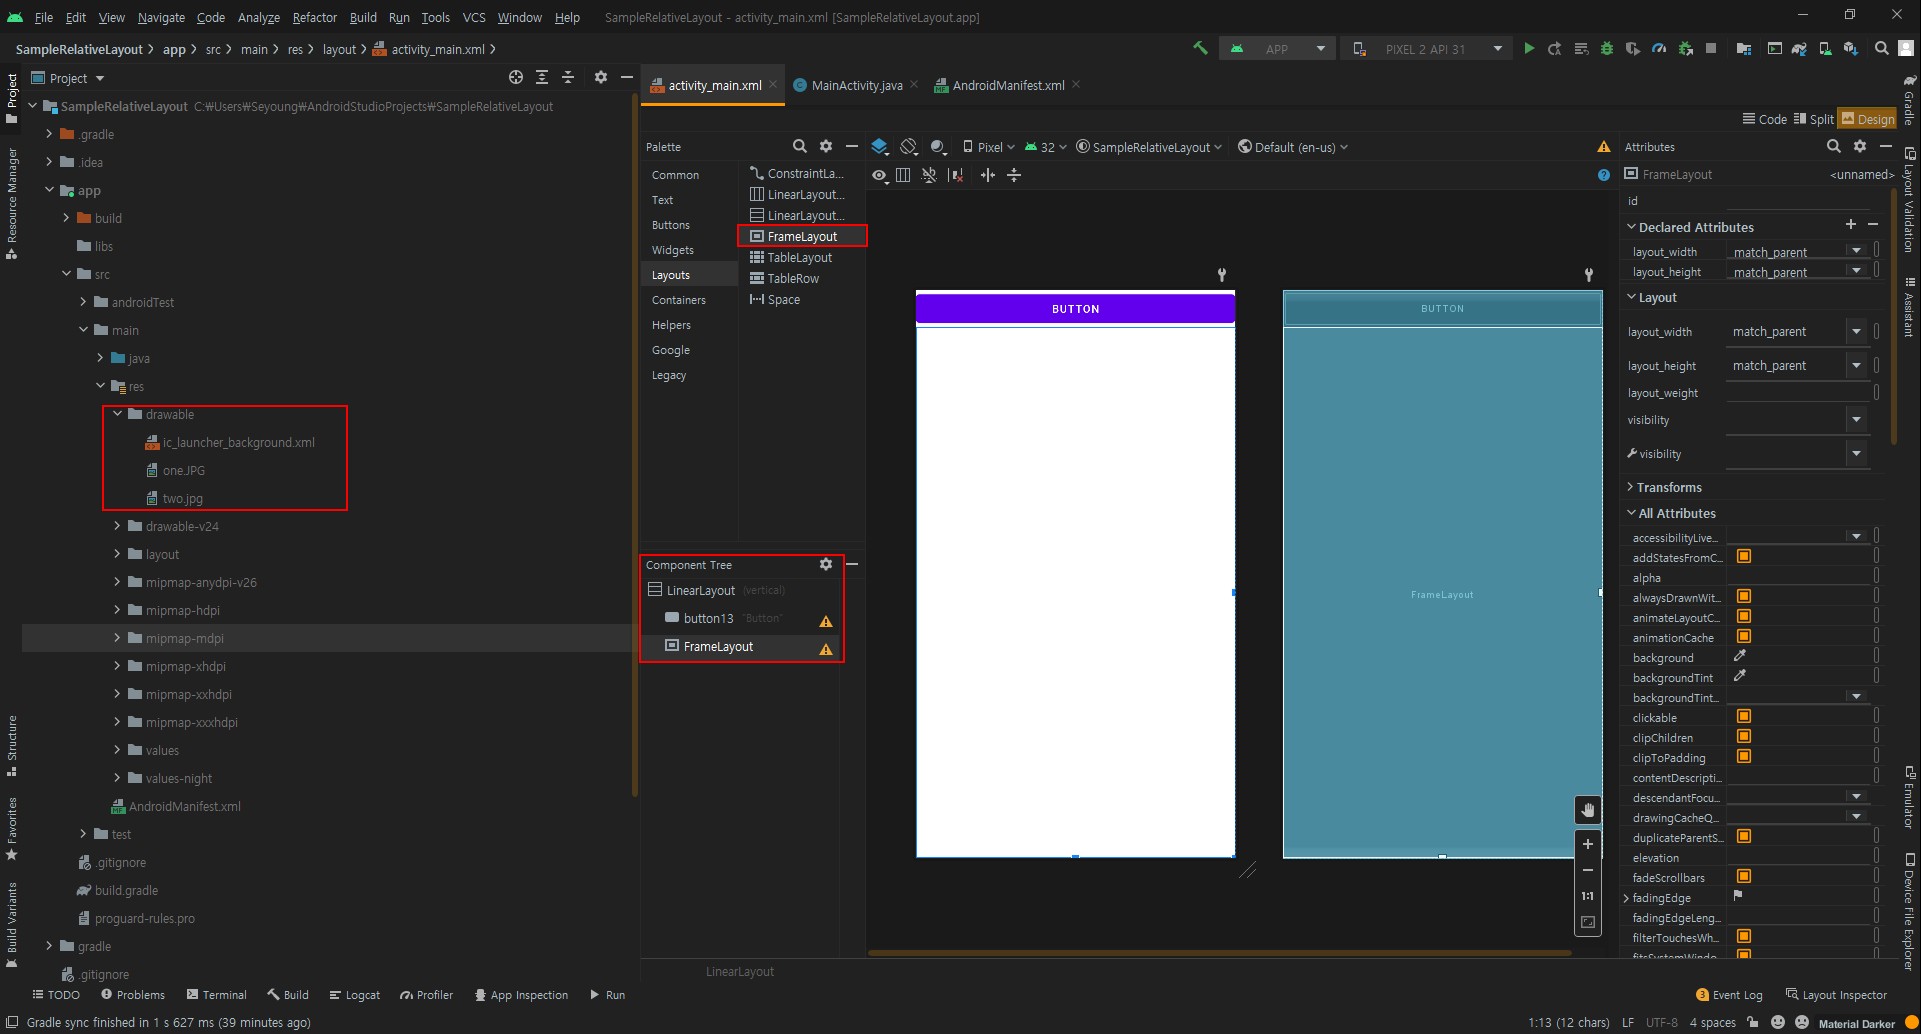
그 후 이미지 뷰 두개를 프레임 레이아웃에 추가한 후 visibility 속성에서 첫 번째 이미지는 invisible,
나중에 추가한 이미지는 visible 값을 설정한다.
인제 자바 소스 코드에서 버튼을 누를 때마다 두 개의 이미지 뷰가 가지는 visibility 속성을 바꿔주면 두개의 이미지가
서로 전환되는 효과를 만들 수 있다.
1
2
3
4
5
6
7
8
9
10
11
12
13
14
15
16
17
18
19
20
21
22
23
24
25
26
27
28
29
30
31
32
33
public class MainActivity extends AppCompatActivity {
    ImageView image1;   // 첫 번째 이미지 뷰를 담을 변수
    ImageView image2;   // 두 번째 이미지 뷰를 담을 변수
    int imageIdx = 0;

    @Override
    protected void onCreate(Bundle savedInstanceState) {
        super.onCreate(savedInstanceState);
        setContentView(R.layout.activity_main);

        image1 = findViewById(R.id.imageView);      // id가 imageView 인 것을 찾아 image1에 넘겨줌
        image2 = findViewById(R.id.imageView2);     // id가 imageView2 인 것을 찾아 image1에 넘겨줌
    }

    public void onbutton1Clicked(View v){        // 버튼이 클릭했을때 발생하는 이벤트
        changeImage();
    }

    private void changeImage(){
        if(imageIdx==0){            // 첫 번째 이미지 전환
            image1.setVisibility(View.VISIBLE);
            image2.setVisibility(View.INVISIBLE);

            imageIdx=1;
        }else if(imageIdx==1){      // 두 번째 이미지 전환
            image1.setVisibility(View.INVISIBLE);
            image2.setVisibility(View.VISIBLE);

            imageIdx=0;
        }
    }

}
1
2
3
4
5
6
7
8
9
10
11
12
13
14
15
16
17
18
19
20
21
22
23
24
25
26
27
28
29
30
31
32
33
34
35
36
37
38
<?xml version="1.0" encoding="utf-8"?>
<LinearLayout xmlns:android="http://schemas.android.com/apk/res/android"
    xmlns:app="http://schemas.android.com/apk/res-auto"
    xmlns:tools="http://schemas.android.com/tools"
    android:layout_width="match_parent"
    android:layout_height="match_parent"
    android:orientation="vertical"
    tools:context=".MainActivity">

    <Button
        android:id="@+id/button1"
        android:layout_width="match_parent"
        android:layout_height="wrap_content"
        android:onClick="onButton1Clicked"
        android:text="Button" />


    <FrameLayout
        android:layout_width="match_parent"
        android:layout_height="match_parent">

        <ImageView
            android:id="@+id/imageView"
            android:layout_width="wrap_content"
            android:layout_height="wrap_content"
            android:visibility="invisible"
            app:srcCompat="@drawable/one" />

        <ImageView
            android:id="@+id/imageView2"
            android:layout_width="wrap_content"
            android:layout_height="wrap_content"
            android:visibility="visible"
            app:srcCompat="@drawable/two" />
    </FrameLayout>

</LinearLayout>
결과