Toast, Snack bar, Dialog, Progress bar
토스트는 간단한 메시지를 잠깐 보여주었다가 없어지는 뷰로 앱 위에 떠 있는 뷰라고 할 수 있다.
토스트 메시지를 만들어서 보여주는 전형적인 방법
1
Toast.makeText(Context context, String message, int duration).show()
Context 객체는 일반적으로 Context 클래스를 상속한 액티비티를 사용할 수 있으며,
액티비티를 참조 할 수 없는 경우에는 getApplicationContext 메서드를 호출하면 Context 객체가 반환된다.
토스트는 그 위치나 모양을 바꿀 수 있는데 다음의 두 메서드는 토스트의 위치와 여백을 지정할 수 있도록 한다.
1
2
public void setGravity(int gravity, int xOffset, intyOffset)		// Toast 뷰가 보이는 위치를 지정하는 사용
public void setMargin(float horizontalMargin, float verticalMargin)	// 외부 여백을 지정한다.
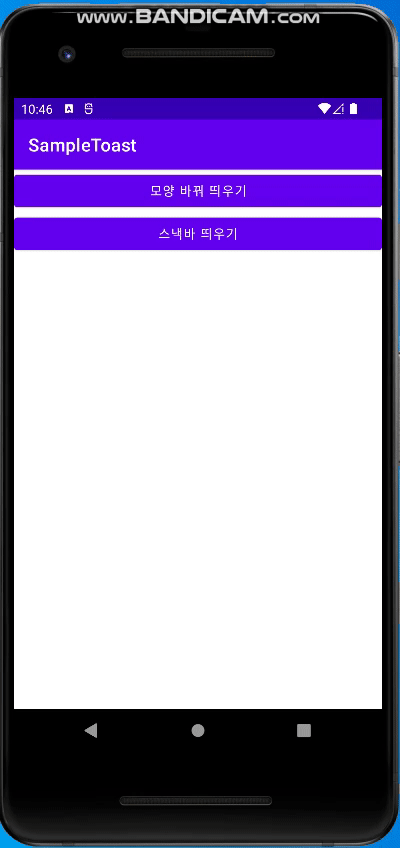
토스트 모양과 위치 바꿔 보여주기와 스낵바 보여주기
MainActivity에서 onButton1Clicked 메서드를 추가해 준다.
1
2
3
4
5
6
7
8
9
10
11
12
13
14
15
16
17
18
19
20
21
22
23
24
25
26
27
28
29
30
31
32
public class MainActivity extends AppCompatActivity {

    @Override
    protected void onCreate(Bundle savedInstanceState) {
        super.onCreate(savedInstanceState);
        setContentView(R.layout.activity_main);
    }

    public void onButton1Clicked(View v) {
        LayoutInflater inflater = getLayoutInflater();

        View layout = inflater.inflate(		// 레이아웃 인플레이터 객체 참조
                R.layout.toastborder,
                (ViewGroup) findViewById(R.id.toast_layout_root));

        TextView text = layout.findViewById(R.id.text);

        Toast toast = new Toast(this);	// 토스트 객체 생성
        text.setText("모양 바꾼 토스트");
        toast.setGravity(Gravity.CENTER, 0, -100);
        toast.setDuration(Toast.LENGTH_SHORT);
        toast.setView(layout);	// 토스트가 보이는 뷰 설정

        toast.show();

    }

    public void onButton2Clicked(View v) {
        Snackbar.make(v, "스낵바입니다.", Snackbar.LENGTH_LONG).show();
    }

}
/app/res/layout 폴더에 toastborder.xml 파일을 추가해준다.
1
2
3
4
5
6
7
8
9
10
11
12
13
14
15
16
17
18
19
<?xml version="1.0" encoding="utf-8"?>
<LinearLayout xmlns:android="http://schemas.android.com/apk/res/android"
  android:id="@+id/toast_layout_root"
  android:orientation="horizontal"
  android:layout_width="match_parent"
  android:layout_height="match_parent"
  android:padding="10dp"
  >

 <TextView
  android:id="@+id/text"
  android:layout_width="wrap_content"
  android:layout_height="wrap_content"
  android:padding="20dp"
  android:textSize="32sp"
  android:background="@drawable/toast"
  />

</LinearLayout>
위 XML 레이아웃은 새롭게 만들 토스트의 형태를 정의한 것으로,
이 레이아웃을 이용해 토스트 메시지가 보이게 된다.
이 레이아웃 안에는 텍스트뷰 태그가 하나 정의되어 있고 ID는 text로 되어 있는데,
토스트 뷰를 위한 레이아웃은 항상 이 형태로 정의되어야 한다.
위에서 배경으로 지정된 그리기 객체는 @drawable/toast 이므로 /app/res/drawable 폴더 안에
toast라는 xml 파일이 있어야 한다. 이 XML 파일을 drawable 폴더에 추가 한 후 아래처럼 작성한다.
1
2
3
4
5
6
7
8
9
10
11
12
13
14
15
16
17
18
19
20
21
22
23
24
25
26
<?xml version="1.0" encoding="UTF-8" ?>
<shape xmlns:android="http://schemas.android.com/apk/res/android"
  android:shape="rectangle"
  >
 <stroke
  android:width="4dp"
  android:color="#ffffff00"
  />

 <solid
  android:color="#ff883300"
  />

 <padding
  android:left="20dp"
  android:top="20dp"
  android:right="20dp"
  android:bottom="20dp"
  />

 <corners
  android:radius="15dp"
  />

</shape>
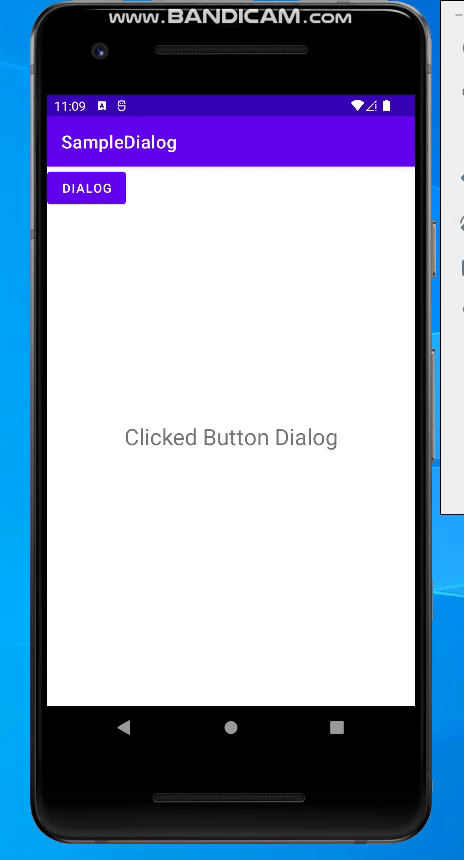
알람 대화상자 보여주기
토스트와 함께 많이 사용되는 알림 대화상자는 사용자에게 확인을 받거나 선택하게 할 때 사용한다.
보통 알림 대화상자는 사용자에게 입력을 받기보다는 일방적으로 메세지를 전달하는 역할을 주로 하며,
예, 아니오와 같은 전형적인 응답을 처리한다.
1
2
3
4
5
6
7
8
9
10
11
12
13
14
15
16
17
18
19
20
21
22
23
24
25
26
27
28
29
30
31
32
33
34
35
36
37
38
39
40
41
42
43
44
45
46
47
48
49
50
51
52
53
54

public class MainActivity extends AppCompatActivity {
    TextView textView;

    @Override
    protected void onCreate(Bundle savedInstanceState) {
        super.onCreate(savedInstanceState);
        setContentView(R.layout.activity_main);

        textView = findViewById(R.id.textView);

        Button btn = findViewById(R.id.button);

        btn.setOnClickListener((v) -> {			// 리스너 람다식
            showMessage();
        });
    }
    private  void showMessage(){
        // 대화상자를 만들기 위한 빌더 객체 생성
        AlertDialog.Builder builder = new AlertDialog.Builder(this);
        builder.setTitle("안내");
        builder.setMessage("종료 하시겠습니까?");
        builder.setIcon(android.R.drawable.ic_dialog_alert);

        //예 버튼 추가
        builder.setPositiveButton("예", new DialogInterface.OnClickListener() {
            @Override
            public void onClick(DialogInterface dialogInterface, int i) {
                String message = "예 버튼이 눌렸습니다.";
                textView.setText(message);
            }
        });
        // 취소 버튼 추가
        builder.setNeutralButton("취소", new DialogInterface.OnClickListener(){
            @Override
            public void onClick(DialogInterface dialog, int which){
                String message = "취소 버튼이 눌렸습니다.";
                textView.setText(message);
            }
        });
        // 아니오 버튼 추가
        builder.setNegativeButton("아니오", new DialogInterface.OnClickListener(){
            @Override
            public void onClick(DialogInterface dialog, int which){
                String message = "아니오 버튼이 눌렸습니다.";
                textView.setText(message);
            }
        });
        // 대화상자 객체 생성 후 보여주기
        AlertDialog dialog = builder.create();
        dialog.show();
    }
프로그레스바 (진행 상태 바)
어떤 일의 진행 상태를 중간 중간 보여 줄 수 있는 가장 좋은 방법 중 하나가 프로그레스바 이다.
프로그레바는 작업의 진행 정도를 표시하거나 작업이 진행중임을 사용자에 알려준다.
프로그레스바의 대표적인 두 가지 형태는 아래와 같다.
| 속성 | 설명 |
|---|---|
| 막대 모양 | 작업의 진행 정도를 알려 줄 수 있도록 막대 모양으로 표시한다. style 속성 값을 ‘android:attr/progressBarStyleHorizontal’로 설정한다. |
| 원 모양 | 작업이 진행 중임을 알려준다. 원 모양으로 된 프로그레스바가 반복적으로 표시 된다. |
XML 레이아웃에 프로그레스바를 추가할 때는
프로그레스바가 갖는 값의 최대 범위는 max 속성으로 설정하고 현재 값은 progress 속성으로 설정한다.
예를 들어, 값의 최대 범위가 100 이면 max 값을 100 으로 설정하고 현재 진행률이 50%라면 max 값이 100 이므로
progress 값을 50으로 설정하면 된다. 진행률이 변경 되면 progress 속성으로 설정되었던 값을 바꾸면 된다.
자바 코드에서 프로그레스 바의 현재 값을 바꿀 때 사용하는 메서드
1
2
void setProgress(int progress) 			// 정수 값을 받아 프로그레스바의 현재 값으로 설정한다.
void incrementProgressBy(itn diff)		// 현재 설정되어 있는 값을 기준으로 값을 더하거나 뺄 때 사용한다.
타이틀 바에 프로그레스바를 표시 할 수 있는데 이 기능은 윈도우 속성으로 정의되어 있고 메서드는 다음과 같다.
1
requestWindowFeature(Window.FEATURE_PROGRESS);
타이틀 부분에 표시 되는 프로그레스 바의 범위는 따로 지정 할 수 없고 디폴트 값으로 0부터 10000사이의 값을 가질 수 있다.
프로그레스 바 사용하기
xml 디자인 창-> Widget 창 -> Progress바 드로그 앤 드롭
1
2
3
4
5
6
7
8
9
10
11
12
13
14
15
16
17
18
19
20
21
22
23
24
25
26
27
28
29
30
31
32
33
34


public class MainActivity extends AppCompatActivity {
    ProgressDialog dialog;

    @Override
    protected void onCreate(Bundle savedInstanceState) {
        super.onCreate(savedInstanceState);
        setContentView(R.layout.activity_main);

        ProgressBar progressBar = findViewById(R.id.progressBar);   // 프로그래스 바 객체 불러오기
        progressBar.setIndeterminate(false);
        progressBar.setProgress(80);    // 진행 상태 80으로 설정

        Button button = findViewById(R.id.button2);
        button.setOnClickListener((v)-> {
            // 프로그레스 대화상자 객체 만들고 설정하기
            dialog = new ProgressDialog(MainActivity.this);
            // 프로그레스 바를 대화상자에 보여주기 위해 dialog 객체 안에 SPINNER로 설정
            dialog.setProgressStyle(ProgressDialog.STYLE_SPINNER);
            dialog.setMessage("데이터를 확인하는 중 입니다.");

            dialog.show();
        });

        Button button2 = findViewById(R.id.button3);
        button2.setOnClickListener((v)-> {
            if(dialog != null)  // 프로그래스 대화상자 없애기
                dialog.dismiss();
        });

    }

}